
WordPress Plugin
Two-Factor Authentication with SecSign ID Plugin
Use SecSign ID WordPress two factor authentication on your WordPress site with an easy and highly secure user login using iOS or Android mobile devices as well as for desktop use.

Find out why our Two-Factor Authentication is the best, some key-facts for developers and why you should upgrade to SecSign for your business.

Learn more about the options of on-premise use and your own customized ID App in your corporate design.

Download the plugin as cloud version for a free and convenient protection.
Table of contents
SecSign ID is a plugin for real two-factor authentication (2FA) for WordPress sites. 2FA adds another layer of security to your website by using a second token. In this case the physical token is your smartphone.
If you seek for more information about about two-factor authentication have a look at the WordPress Plugin Page or our Github site.
Questions? Feel free to get in touch with us if you need help setting up your SecSign ID plugin or to request a plugin for a not yet supported environment.
1. Installation
Prerequisites
In order to use our WordPress two factor authentication plugin, log into
WordPress as admin and click on “Plugins” in the main menu to open the
Plugins screen.
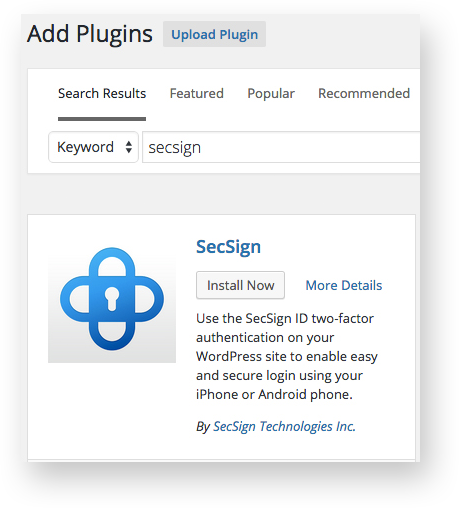
Click on “Add New” in the submenu under Plugins. Search for “SecSign” and click “Install Now” or click on “Upload” and select the downloaded zip archive.
2. Activation
- Log into WordPress as admin and click on “Plugins” in the main menu to open the Plugins screen. Then find “SecSign ID Login” in your list of Plugins.
- Click “Activate” under “SecSign ID Login”.
- Click “Appearance” in the main menu and then click on “Widgets” in the submenu.
- Drag and drop the “SecSign ID Login” widget to the desired destination, for example the “Main Sidebar”

3. User configuration
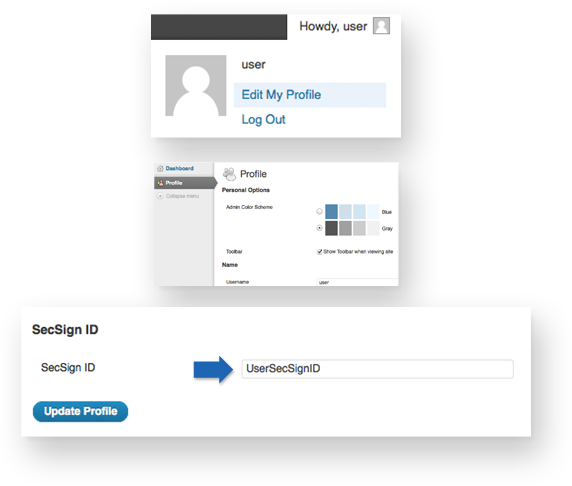
- Login into WordPress as a user and go to your profile page.
- Assign a SecSign ID to your profile to allow SecSign ID WordPress two factor authentication.
- Optionally, you can simply sign in with your SecSign ID. You will then be shown a dialog, where you can create a new user or assign your SecSign ID to an existing WordPress user. In order to do this, the two options for Fast Registration need to be activated (see 4).
4. Plugin settings
Log into WordPress as an administrator and click on “SecSign ID Login” in the main menu. You will find the following settings:
- Service Name: The name of this web site as it shall be displayed on the user’s smart phone.
- Plugin Layout: Choose if the frontend login form shall be displayed with padding and a shadow or not.
- Show SecSign ID login form on wp-login.php Page? Check if you want to show the SecSign ID WordPress two factor authentication on the WordPress login page.
- It is strongly recommended to enable the SecSign login, because users with deactivated password logins won’t be able to login anymore. See troubleshooting.
The following block is divided into WordPress roles.
- In the upper half, you see all administrators, editors, authors und contributors. It is recommended to deactivate the password logins except for the main administrator or users without smartphone.
- In many cases, it takes only one weak password to cause a breach in the security system of the whole enterprise.
- The main administrator and all users without smartphone are advised to choose a strong password (unique, min. 14 letters with capitals, numbers and special characters, no words).
- You find the subscribers on the lower section. When Fast Registration is activated, you will find all newly registered users in this area.
- These users do not have authorisation to change anything except their own profile.
- If you choose to grant more rights to a user, click on “Users – All Users” in the main menu, choose the user and select under “Role” the desired WordPress role.
Fast Registration: In order not to have to create new user accounts yourself you can allow your co-workers or web site users to create user accounts themselves by logging in with their SecSign ID via wp-login.php or the login widget. You can allow them to create a new WordPress user or assign an existing one. After they created a WordPress account, you can assign WordPress roles to your co-workers via the user administration.
- Allow SecSign ID users to create a new WordPress user when logging in?
The user can create a new subscriber account after a successful login via SecSign ID. The user just needs to provide a new username. - Allow SecSign ID users to assign an existing WordPress user when logging in?
The user can assign his SecSign ID to his existing WordPress account after a successful login via SecSign ID. The user needs to provide his WordPress username and password. The user will be logged out after 5 unsuccessful logins. - If both options are disabled and an unknown user tries to log in via SecSign ID WordPress two factor authentication, an error will be thrown.
5. Troubleshooting
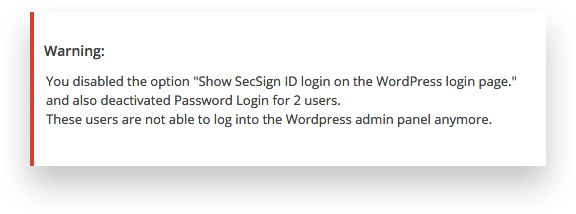
You get the following warning:
You disabled the option “Show SecSign ID login on the WordPress login page.” and also deactivated Password Login for 2 users.
These users are not able to log into the WordPress admin panel anymore. For more Information visit secsign.com/wordpress-tutorial.
Several settings interfere with each other.
To fix this error, activate “Show SecSign ID login form on wp-login.php Page?” on the SecSign ID settings page. Or you grant all users password login (not recommended).

If you enabled the SecSign ID backend login and locked yourself out, do the following steps in order to disable the SecSign ID WordPress two factor authentication backend login:
- Open your WordPress directory via (S)FTP and rename the folder wp-content/plugins/secsign to secsign1.
- Reload the backend login page and login with your WordPress username and password.
Important: Immediately rename the folder back to secsign. - The SecSign ID WordPress two factor authentication Plugin is now deactivated. Click on “Plugins” in the main menu, look for “SecSign ID Login” and activate it.
- Adjust options in the SecSign ID settings (see 4).
6. Available APIS
We provide an ever growing list of APIs and plugins to easily integrate the SecSign ID Two-Factor Authentication in any project. An overview is available at Plugin and APIs.
We do not only offer APIs in different programming languages but also plugins for CMS, Server and VPN environments, oAuth2 and many more. These plugins use our APIs and offer additional functionalities, for example user management, easy and native installation, logging or integration in firewalls or Active Directory.
The JIRA plugin for example uses the JAVA-API. The PHP-Api and JS-API is used by WordPress, Joomla, Drupal, Typo3 and many more. The ASP.net/C#-API is used for the Windows and Cisco VPN and the C-API is used for protecting Unix SSH services. The Objective-C API is used by our AppleTV and iPhone/iPad apps.

7. See for yourself
You can experience the SecSign ID two-factor authentication and the two-factor login by simply integrating the plugin into your website or test environment. Or you can try out the login process on our website without having to register first. You already have a SecSign ID or you want one? Login now and use the portal or use our hassle free registration.
See for yourself how fast and convenient the login process using challenge-response authentication with 2048-bit key pairs is. There is no need for passwords, and no passwords or other confidential information are ever transmitted. It is easy to integrate and simple to use.
For more information about the patented SafeKey procedure and it's unique security can be found here.
If you are missing an API for the programming language you are working with, feel free to contact us and we’ll find a solution with you. If you need help with the integration into an existing system or you can’t find the plugin for your content management system you are working with, don’t hesitate to contact our support team.
Your own ID-Server
On premise installations of SecSign ID offer the flexibility to connect with your preferred servers, services, and devices. And you can customize the SecSign ID with your own organization’s branding.

Why upgrade to SecSign?

On-premise or in the cloud
Choose between our SecSign ID Cloud or operate your own on-premise Two-Factor Authentication server.

Easy customization
Operate your own YourBrand ID app - Two-Factor Authentication customized to your needs.
Ready-to-use SDK
Integrate SecSign ID Two-Factor Authentication in existing apps with our ready-to-use SDK.
Easy user management
Use the Two-Factor Authentication Server to secure your company Active Directory/LDAP. Your own Identity and Access Management System, for example for mandatory updates and additional security features.

Cover all logins
Integration in any login environment: web, local, VPN, remote desktop, mobile logins and many more.

Plugins for all your needs
No need for complex integration: we have plugins for almost all environments.
Contact Us
Sales
Want to learn more about SecSign’s innovative and highly secure
solutions for protecting your user accounts and sensitive data?
Use our contact form to submit your information, and a SecSign sales representative will contact you within one business day.
Product Support
If you need assistance with an existing SecSign account or product
installation, please see the FAQs for more information on the most common questions. You don’t find the solution to your problem? Don’t hesitate to contact the
Product Support
I am Interested in