
Important Tips for Developing for the Apple Watch
03/29/2015 / 0 Comments
Important Tips for Developing for the Apple Watch
Recently we added Apple Watch support to our SecSign ID iPhone app. While we were doing this, we learned some important things about the Apple Watch and how to develop for it, so we’ve decided to share some of those valuable lessons and tips with you. For more information about our SecSign ID app and how it can protect your websites and applications with industry-leading two-factor authentication, visit our web site or our AppStore page.
Capabilities of the Apple Watch
The computing capabilities of Watch apps are pretty limited right now. All complex computation is done on the paired iPhone. You can think of the Apple Watch as an external display. You can show things on the Watch screen and use it to receive input from the user, but that’s all that Apple offers right now; nonetheless, that’s enough for many use cases.
Also, the Apple Watch is intended only for brief user interactions. The display automatically turns off when the user’s wrist is lowered. Shortly after the display is turned off, the Apple Watch will terminate any running app. So you need to adapt your app workflow to this.
Parts of an Apple Watch App
Watch Apps are divided into three parts:
1. The WatchKit App: This is the portion of your app that actually runs on the Apple Watch, but Apple currently doesn’t allow you to do any computation with it. So your WatchKit app can only contain the user interface and resources like images that are shown to the user.
2. The WatchKit Extension: This is an iOS8 extension of your WatchKit App that runs on the paired iPhone and is used for computation. In the extension, you can set user interface elements like the text for a text field or the image for an image view. When the user interacts with the WatchKit app interface, actions are called in the WatchKit Extension. The communication between the WatchKit app and WatchKit Extension is handled in the background by Bluetooth and WiFi.
3. The iPhone App: All WatchKit apps must be deployed through an iPhone app. There are no standalone WatchKit apps. You can use the existing functionality of the iPhone app in your Apple Watch apps, but the WatchKit Extension and the iPhone app are not running in the same process space. Therefore, they can’t directly access each other’s data or functions. You have to establish a communication channel between them to use the iPhone app capabilities in the WatchKit Extension. All long-running complex computations must be done in the iPhone app.
Communication
The communication between your WatchKit app and the WatchKit Extension is done in the background. You don’t have to worry about it. But if you have functionality in your iPhone app that you want to use, you need to communicate between the WatchKit Extension and your parent iPhone app.
Starting the iPhone App from the WatchKit Extension by Calling openParentApplication and Exchanging Data
You can send a request from the WatchKit extension to the parent iPhone app by calling openParentApplication:reply: on WKInterfaceController. This will open the parent iPhone app in the background, if it’s not already running, and send some data to application:handleWatchKitExtensionRequest:reply: in the AppDelegate class in the parent app.
The data send is an NSDictionary which contains serializable content. The second parameter is a block which is called when the iPhone answers your request.
This is example code on the WatchKit Extension side. In this case, we are sending an NSDictionary with a key named “ExchangeObject” and an object as value.
The request object can be anything which is serializable by the NSKeyedArchiver, so it has to implement initWithCoder: and encodeWithCoder:
In this example, we are sending a simple string, but you can use more complex objects if needed. When this asynchronous call returns your answer, you can unarchive the answer from the dictionary back to an object and interpret it.
NSString* request = …;
BOOL didOpenParent = [WKInterfaceController openParentApplication:@{@"ExchangeObject" : [NSKeyedArchiver archivedDataWithRootObject:request]} reply:^(NSDictionary *replyInfo, NSError *error) {
  if (error != nil) {
    NSLog(@"Error: %@", [error localizedDescription]);
  }
  NSString* answer = [NSKeyedUnarchiver unarchiveObjectWithData:replyInfo[@"ExchangeObject"]];
  //do something with the answer
}
}];
if (!didOpenParent) {
  NSLog(@"Can't start iPhone app!“);
}
On the iPhone side, you need to implement application:handleWatchKitExtensionRequest:reply:. This will be called with the request as the parameter and a block to send your reply back to the extension. If your iPhone app is not running, application:didFinishLaunchingWithOptions: is called first and your iPhone app is started in background mode. You can then unarchive the request to an object and do your computation. Then you send a dictionary back by using the reply block.
- (void)application:(UIApplication *)application handleWatchKitExtensionRequest:(NSDictionary *)userInfo reply:(void(^)(NSDictionary *replyInfo)) {
  if (userInfo[@"ExchangeObject"] != nil) {
    NSString* request = [NSKeyedUnarchiver unarchiveObjectWithData:userInfo[@"ExchangeObject"]];
    //do something with the request
    NSString* answer = ..;
    reply(@{@"ExchangeObject" : [NSKeyedArchiver archivedDataWithRootObject:answer]});
  }
  else {
    NSLog(@"Request from Apple Watch Extension to iPhone app doesn't contain ExchangeObject");
  }
}
After this is completed, you can send another request. Note that you can’t have two requests at the same time and you can call the reply block more or less than once. But if you want to reply later, maybe because you need to get some data from the network, you can save the reply block as a property and call it later. Define a property like this:
@property (copy) void (^replyBlock)(NSDictionary *replyInfo);Then, in application:handleWatchKitExtensionRequest:reply:, assign it to the property:
self.replyBlock = reply;You can then later call it like this:
self.replyBlock(@{@"ExchangeObject" : [NSKeyedArchiver archivedDataWithRootObject:object]});Make sure you call it back after a few seconds and don’t wait too long or else the Apple Watch might have terminated your WatchKit app. If you want to do a longer background action, e.g. get data from your remote server, you have to tell iOS that by using the beginBackgroundTaskWithExpirationHandler: selector on UIApplication. This will prevent the system from terminating your app for up to 10 minutes. Please also note, that this is not needed in the Simulator but on the real device.
So after you received the request from the Extension, you should begin a background task:
UIBackgroundTaskIdentifier backgroundTaskIdentifier = [[UIApplication sharedApplication] beginBackgroundTaskWithExpirationHandler:^{
            NSLog(@"background task expires soon");
        }];
And when you have sent the answer to the extension, you can end the background task:
[[UIApplication sharedApplication] endBackgroundTask:backgroundTaskIdentifier];If you have many requests you can only request a new background task if backgroundTaskIdentifier is not set:
if (backgroundTaskIdentifier == UIBackgroundTaskInvalid)
{
   backgroundTaskIdentifier = [[UIApplication sharedApplication] beginBackgroundTaskWithExpirationHandler:^{
      NSLog(@"background task expires soon");
    }];
}
You will also have to set backgroundTaskIdentifier to UIBackgroundTaskInvalid in your init method and when you end the background task.
Sharing Data Between the WatchKit Extension and Your iPhone App in a Shared App Group
You can also share data by writing it to a shared app group. This is a place where both the WatchKit Extension and the iPhone app can read and write. But this approach has some disadvantages to the openParentApplication call:
- You can’t start the iPhone app (or WatchKit Extension) by using a shared app group. So, if your app is not running, you have to call openParentApplication anyway, which already allows you to send and receive your data.
- Changing data in the shared app group won’t be noticed by the other part. You can use Darwin Notifications to notify the other part about changes, but this won’t work if the iPhone app or WatchKit Extension is not running or if it was just closed.
That’s why we use openParentApplication for communication. But there is also a use case for shared app groups: The iPhone can, for example, save data to it for the WatchKit Extension to view. It can just update the data when there is something new and, when the Extension is started, it just reads the data. But this will of course only make sense if you don’t need fresh data. In our app, we use the openParentApplication call exclusively because we need an answer right after we send a request to the iPhone app.
Starting the WatchKit Extension/App from the iPhone App
As you may have noticed, there is no direct way to start your WatchKit Extension/WatchKit App from the iPhone app. It can only be manually started by the user on the Apple Watch home screen or if it receives a local or remote notification. If the iPhone receives a notification, it will decide if it shows it on the Apple Watch or on the iPhone. If there is a paired Apple Watch and the iPhone is locked, it will be shown on the Apple Watch or else it will be shown on the iPhone. So you can’t be sure if it goes to the Apple Watch, but that’s the only way to open it. This limits the use cases for Apple Watch apps, but, for many use cases, it is sufficient to only react to notifications or react to being started explicitly.
Keychain Access
If you are accessing the keychain in your iPhone app, this will now happen in the background, which means that you have to use a different accessibility mode. See this blog post for more details. If you want to have access to the keychain in your extension, you can add a shared keychain access group.
Identifiers, UDIDs, Provisioning Profiles and Code Signing Identity
To deploy your app, you need to add two new iOS App IDs in the iOS Dev Center. Take your App iD com.company.app and append watchapp and watchkitextension to make new App IDs. So you end up with:
com.company.app
com.company.app.watchapp
com.company.app.watchkitextension
You will also need two additional provisioning profiles for your WatchKit Extension and your WatchKit App. And you need to make sure you sign the code of your iPhone app, your WatchKit Extension and your WatchKit App with the same certificate and also include this code signing certificate in all provisioning profiles. This sums up to 9 provisioning profiles in our case: For each of the three App IDs you need a provisioning profile for each Scheme (Development, AdHoc and AppStore).
Also you have to add the Apple Watch to your Devices in the iOS Dev Center, like you would do with an iPhone. You can find out the UDID of the Apple Watch by going to Window -> Devices in XCode. This device must then also be included in all provisioning profiles (Dev and AdHoc).
XCode sometimes messes things up, so you may have to manually edit the project.pbxproj file in the YourApp.xcodeproj package to set the correct provisioning profile and code signing identity.
Hardware Access
Currently, developers can´t get the heartbeat information or other sensor data via an API call. The Apple Watch will store this information in the Health app. Also, you can’t tell on the iPhone if there is an Apple Watch paired or if the Apple Watch is worn by the user, but the Apple Watch knows this by using a skin contact sensor on the back of the watch.
Protection Against Unauthorized Access
The Apple Watch has its own PIN code to protect it against unauthorized access. This PIN needs to be entered once after you put it on your arm. After this, the Apple Watch continually senses the user with a skin contact sensor on the back of the Watch. You will have to re-enter the PIN every time you take the Watch off. There is also the possibility to auto unlock your Watch when your iPhone is unlocked and in range. You can also disable the PIN code if you want, although that is certainly not recommended for security reasons.
You can find more tips here (https://developer.apple.com/watchkit/tips/)
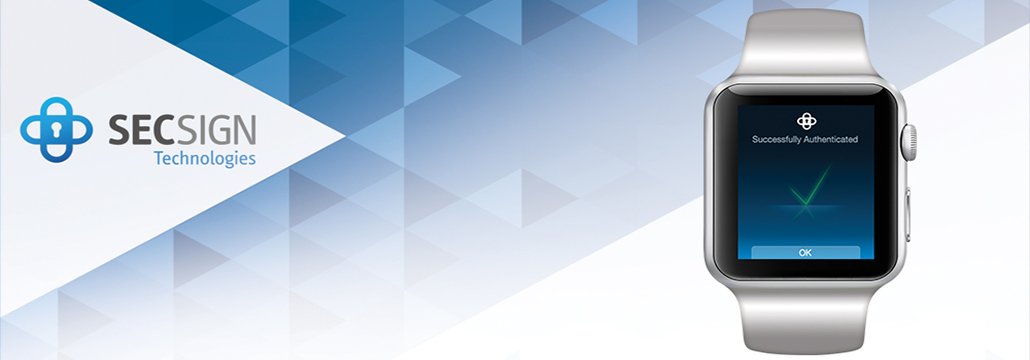
Get a Sneak Preview of Our Apple Watch App for Login Security
The lessons we’ve shared here were learned as we developed the world’s first two-factor authentication app that supports Apple Watch devices. Our advanced cryptography eliminates passwords and their associated data security risks, and it replaces outdated and dangerous login security procedures with next-generation mobile authentication that makes it physically impossible to hack user logins.
Users can log into websites, applications, networks, and even smart TVs without using passwords and by relying on encrypted asymmetric software keys that are combined with out-of-band knowledge factors and/or user biometrics to verify identity.
Our beta Apple Watch app has extended and further simplified this highly secure authentication by enabling biometric identity verification via skin contact. You can get a sneak preview by watching our brief overview video for SecSign ID for Apple Watch.
Our mobile app and authentication are absolutely free for developers to use through our mobile apps and our Secure Trust Center Servers in the cloud. Optionally, our technology can be installed on your own architecture as an on-premise solution operating on your own servers and behind your firewall, and it can also be integrated with your applications to provide unbeatable login security.
To learn more about SecSign ID, visit our website or contact us for a free demo and consultation.
About SecSign Technologies
SecSign Technologies Inc., located in Henderson, Nevada, is a sister company of SecCommerce GmbH of Hamburg, Germany, a pioneer of cryptography solutions with more than 16 years of experience in developing public key infrastructure (PKI), electronic signature, and smart card technologies.
Our security experts and cryptography engineers have developed, deployed, and maintained systems that have successfully protected confidential business data and user access for numerous major corporations, including IBM, Siemens, Johnson & Johnson, Fujitsu, T-Systems, BMW, and Audi.
SecCommerce GmbH was founded in 1998, and its software solutions are used by security and compliance-focused developers and IT leaders to secure communication, access to online portals, and long-term archiving. SecCommerce was one of the first companies in the world to use electronic signature components to guarantee security for data archiving and communication for large insurance companies, banks, and national institutions.
Share this entry


Categories
- Apple (11)
- Atlassian (8)
- Biometrics (6)
- FIDO (2)
- General (35)
- Secure Portal (9)
- Two-Factor Authentication (35)
- WebAuthn (1)
- Wordpress (2)
Contact Us
Sales
Want to learn more about SecSign’s innovative and highly secure
solutions for protecting your user accounts and sensitive data?
Use our contact form to submit your information, and a SecSign sales representative will contact you within one business day.
Product Support
If you need assistance with an existing SecSign account or product
installation, please see the FAQs for more information on the most common questions. You don’t find the solution to your problem? Don’t hesitate to contact the
Product Support
I am Interested in