

Refresh
With our new Refresh feature, you can click the refresh icon to reload any current Portal view and check for recent actions or uploads. This is ideal when you may be sharing folders and files and collaborating with others in real-time. The Refresh feature helps you make sure that you’re seeing the latest updates in the Portal.
To access the Refresh feature, use the icon in the Portal top menu, in the left navigation menu, or you can also access it by right-clicking and choosing it from our context menu.

Information Button for Files and Folders
When viewing any directory in the Portal, there is now an ‘i’ button shown to the right of any folder, and an ‘i’ button will also appear whenever you mouse over a particular file. Click the ‘i’ button to access information about your files and folders, including direct access to our sharing function and information about any sharing that may already be configured for your data.

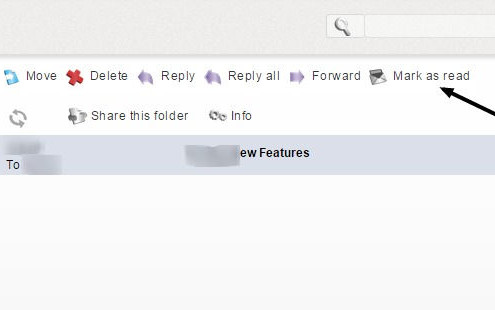
Mark as Read and Unread
Now in your encrypted messaging mailboxes, when you select messages in your list, you can choose “Mark as Read” or “Mark as Unread” from Portal’s top menu. You can access the same feature from within a message by clicking “Mark as Read” or “Mark as Unread” in the top menu of your message view.
New Mobile User Interface
When accessing the Portal from your mobile device, including tablets and smartphones, there is now a new user interface with mobile-optimized designs for smaller screens.
Home Screen
When first signing into the Portal, you will see our Home screen with our icons for core Portal options. To navigate to Messages, Folders, or Sharing, see our Navigation section below.
Navigation
To navigate to your Messages, Folders, or Sharing directories and options, tap the Portal ‘Lock’ icon at the top left of your screen. This will open a drop-down menu where you can easily tap on any of the options to navigate to that area of your Portal account. To switch between any area of the Portal, such as changing your view from Messages to Folders or from Folders to Sharing, tap the same top left ‘Lock’ icon to open the menu and choose your desired destination.
File Options
On mobile devices, when you want to choose a file and perform some of our standard file functions like Send, Download, Copy, Move, and Delete, you can simply click on the check box next to the desired file and an Actions menu will appear at the top of your screen, below the Portal toolbar. Just tap on this Actions option and a drop-down menu will appear with a complete list of all available file options.
NOTE: If you have not turned off the help tip for your top left ‘Lock’ navigation menu in the Portal, this tip may overlap your Actions menu. You can simply click the ‘X’ and confirm the permanent removal of the help tip reminder in order to make your Actions menu visible.
New File Viewer Interface
To optimize our Portal file viewer for mobile devices, we’ve updated the design of our file viewer screen for desktop and mobile. Our right-click context menus have been adapted and converted into a convenient and mobile-friendly toolbar at the top left of the file viewer.
If you’re using the file viewer on desktop or a tablet device, once you’ve opened a file in the viewer, just click or tap one of the icons in the top left menu to access all of our core file options. If you’re accessing the viewer from a smartphone, then you will see only two icons in the top left menu. One will show a downward arrow and you can tap on this to see a full drop-down menu of these same options. See the screenshots below to see the two variations of the viewer layout.
From left to right in our below screenshot, the options are:
- Download
- Share
- Send as Attachment
- Rename
- Delete
- File Info
- Add a Note

Also, when opening a file, such as a PDF, in the Portal file viewer on a tablet or smartphone device, you may notice that desktop options such as maximize, minimize, and rotate do not appear on the screen as they do on a desktop computer. For simplicity, these features are not enabled when using the file viewer on mobile devices.
Uploading Files through Shared Links
Now, when you create a shared link for a folder and send it to users who don’t have a Portal account, you can also allow those same users to upload files to your folders. When creating your shared link, just click or tap on Change Protection Settings and then check the box next to “User can upload documents into folder”. This will allow anyone who has access to your link to upload files and documents into your folder and not just download the contents.

Once users have access to your shared folder through an external web link, they can easily drag and drop new files to upload them into the folder by using our simple interface. Or they can click the Upload Files button to navigate to files on their computer or device and upload them that way.

Search Feature and Profile Improvements
Our search function has also been revised and optimized for greater power and faster response. There is also a more narrow view of user profiles found in your searches, to make it easier to see user information on your screen.

As always, it is important for any Portal user to add important profile details such as a person’s name and email address, and to make these details public within the Portal to allow other users to find them in searches. Email addresses are also important, whether searchable or not, for configuring and receiving automatic notifications of new messages, updates to files and folders, and sharing invitations.
Create Folder Option During Uploads
You have now the option to create quickly a new folder or subfolder while already uploading the data with the upload option from the Portal main menu or from the right-click context menu. When you select a file to upload and your destination directory within the Portal, you will also see a Create Folder button in our upload dialog window. Simply click or tap ‘Create Folder’ and the Portal will prompt you to name your new folder/subfolder. The Portal will now create this new folder/subfolder and upload the file into it.

Please also mention that it is now possible to create a new folder even during the upload- / copy- / move-process by using the create folder-button. This button can be seen after the selection of the folder and the desired action.


